Drip irrigation offers a water-wise solution, detailed in comprehensive guides like the PDF resources available online, promoting efficient resource utilization for farms and gardens.
These systems minimize waste, addressing concerns about precious water resources, and are adaptable for diverse applications, as highlighted in installation documentation.
Understanding the principles within a drip irrigation installation guide PDF empowers users to implement effective watering strategies, maximizing yields and conserving water.
What is Drip Irrigation?
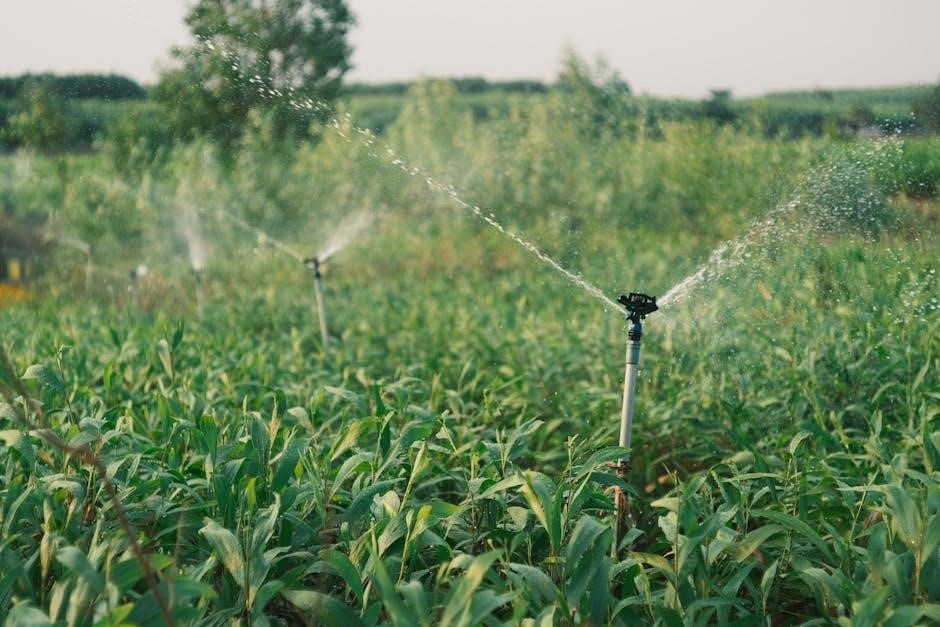
Drip irrigation is a highly efficient watering method delivering water directly to plant roots, minimizing evaporation and runoff – a concept thoroughly explained in a drip irrigation installation guide PDF.
Unlike traditional methods, it releases water slowly and precisely, targeting designated areas like gardens, flower beds, and trees, as detailed in available resources.
This targeted approach, outlined in installation manuals, drastically reduces water wastage, making it ideal for regions facing water scarcity. The PDF guides emphasize the system’s versatility, suitable for various landscapes.
Essentially, a drip system utilizes a network of tubing and emitters to slowly release water, promoting healthy plant growth while conserving this vital resource. These guides often showcase diagrams and step-by-step instructions for proper setup.
It’s a practical and sustainable solution, readily accessible through online PDF documentation.
Benefits of Drip Irrigation Systems
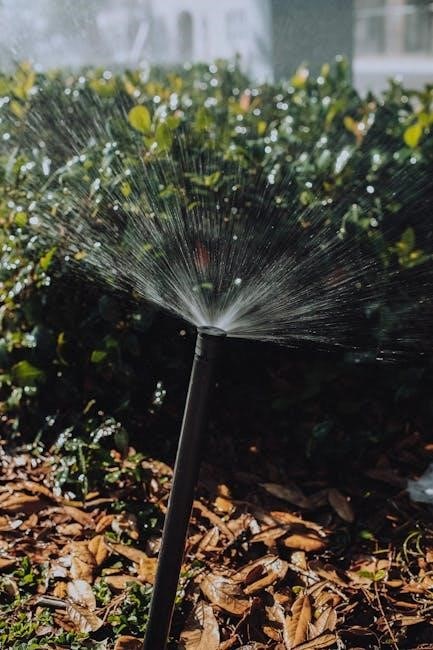
A drip irrigation installation guide PDF highlights numerous advantages, starting with significant water conservation – reducing waste from evaporation and runoff, a key benefit detailed in these resources.
These systems promote healthier plant growth by delivering water directly to the roots, minimizing foliage wetness and disease risk, as explained in comprehensive guides.
PDF documentation emphasizes reduced weed growth, as water is targeted only to desired plants, limiting moisture available for weeds. Versatility is another key benefit; systems adapt to various terrains.
Furthermore, drip irrigation minimizes soil erosion and nutrient leaching, contributing to healthier soil. Installation guides often showcase cost savings through reduced water bills and labor.
Ultimately, these systems offer a sustainable and efficient watering solution, thoroughly documented in readily available PDF resources.

Planning Your Drip Irrigation System
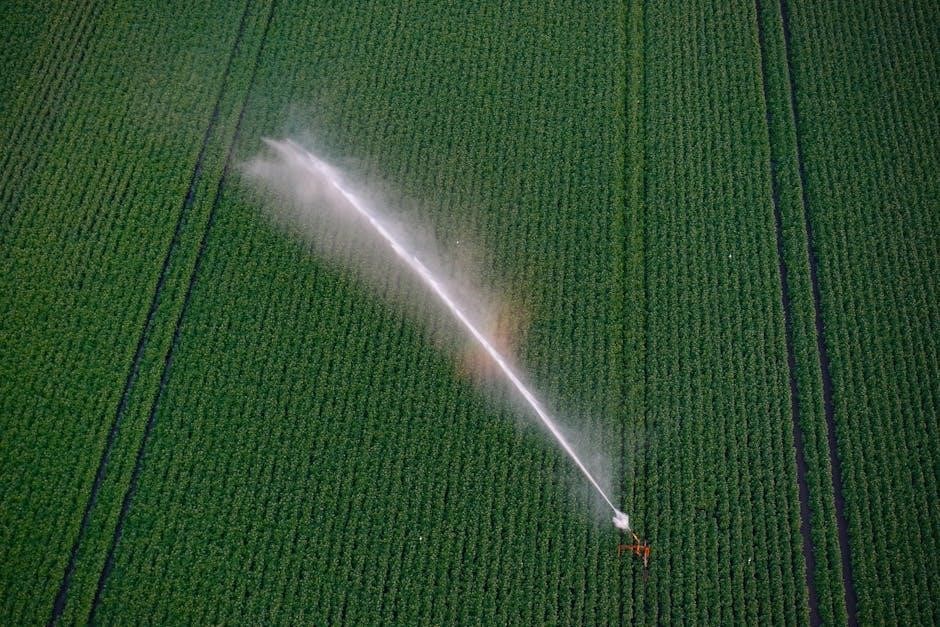
Drip irrigation installation guide PDFs stress careful planning, including assessing plant needs and mapping garden layouts for optimal water delivery and system efficiency.
Proper planning, guided by these resources, ensures effective water pressure and flow rate calculations for a successful drip irrigation setup.
Assessing Water Needs of Your Plants
Drip irrigation installation guide PDFs consistently emphasize the critical first step of understanding your plants’ individual water requirements. Different species, sizes, and even sun exposure levels dramatically influence how much water each plant needs to thrive.
These guides often recommend grouping plants with similar watering needs together into “hydrozones” to optimize drip irrigation efficiency. Consider factors like root depth – deeper-rooted plants generally require less frequent, but more thorough, watering.
Resources detail how to research specific plant needs or observe plants for signs of under or overwatering. Accurate assessment prevents water waste and promotes healthy growth, ensuring your system delivers precisely what each plant demands.
Understanding soil type is also crucial, as sandy soils drain faster than clay soils, impacting watering frequency.
Mapping Your Garden Layout
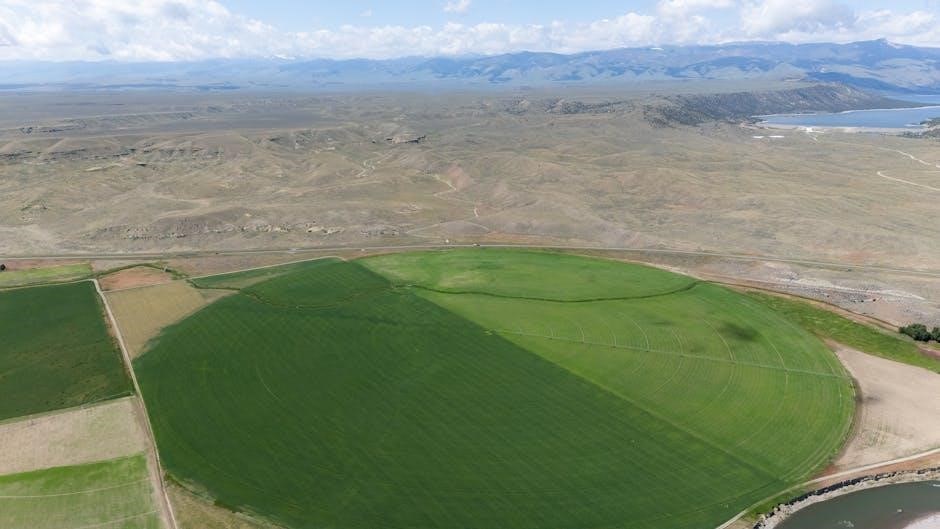
Drip irrigation installation guide PDFs universally stress the importance of a detailed garden map before beginning any installation. This visual representation helps determine the necessary length of drip tubing, the placement of emitters, and the overall system design.
The map should accurately depict plant locations, pathways, and any obstacles like trees or structures. Consider future plant growth when planning emitter placement to ensure adequate coverage as plants mature.
Guides often suggest using graph paper or digital design tools for creating the map. Accurate measurements are vital for calculating water pressure and flow rate requirements, optimizing system performance.
A well-planned layout minimizes waste and ensures efficient water delivery to every plant, maximizing the benefits of drip irrigation.
Calculating Water Pressure and Flow Rate
Drip irrigation installation guide PDFs consistently emphasize calculating water pressure and flow rate as a crucial step. Insufficient pressure leads to uneven watering, while excessive pressure can damage components.
Most guides recommend using a water pressure gauge connected to your water source to determine existing pressure. Flow rate, measured in gallons per minute (GPM), dictates the system’s capacity.
The PDF resources detail how to calculate the total emitter flow rate based on the number and type of emitters used. This value must be less than the available flow rate from your water source.
Pressure regulators are often necessary to reduce high pressure to the optimal range for drip irrigation, typically 25-30 PSI. Accurate calculations ensure efficient and reliable system operation.
Components of a Drip Irrigation System
Drip irrigation installation guide PDFs detail essential parts: a main supply line, filter, pressure regulator, and drip tubing with emitters for targeted watering.
Understanding each component’s role, as outlined in these guides, is vital for successful system assembly and long-term performance.
Main Supply Line
Drip irrigation installation guide PDFs consistently emphasize the main supply line as the foundational element of the entire system. Typically constructed from polyethylene (poly) tubing, it delivers water from the source to the distribution network.
Guides detail selecting the correct diameter – often ½ inch or ¾ inch – based on garden size and water flow requirements. Proper sizing prevents pressure loss and ensures adequate water delivery to all emitters.
Installation involves securely connecting the line to the water source, often utilizing fittings like threaded adapters or hose connectors. These PDF resources highlight the importance of burying the supply line to protect it from UV damage and physical harm, extending its lifespan and maintaining system integrity.
Furthermore, guides often recommend using pressure-rated tubing to withstand the system’s operating pressure.
Filter
Drip irrigation installation guide PDFs universally stress the critical role of filtration. Filters prevent clogging of emitters – a common issue – by removing sediment, algae, and other debris from the water supply. Guides detail various filter types, including screen, disc, and media filters, each suited to different water qualities.
Selecting the appropriate mesh size is crucial; finer meshes capture smaller particles but require more frequent cleaning. PDF documentation emphasizes regular filter maintenance, including flushing or replacing filter elements, to maintain optimal system performance.
Proper filter installation, typically between the water source and the pressure regulator, is also highlighted. Guides often illustrate correct flow direction for effective filtration. Ignoring filtration, as warned in these resources, leads to emitter failure and uneven watering.
Ultimately, a clean filter ensures a long-lasting, efficient drip system.
Pressure Regulator
Drip irrigation installation guide PDFs consistently emphasize the necessity of a pressure regulator. Drip systems operate at significantly lower pressures than standard household water lines, typically around 25-30 PSI. Without regulation, high pressure can damage tubing and emitters, leading to leaks and system failure.
These guides detail how to select a regulator based on incoming water pressure and system requirements. Adjustable regulators offer flexibility, allowing fine-tuning for optimal performance. Installation typically occurs after the filter, ensuring clean water reaches the regulator.
PDF resources often illustrate proper installation orientation and highlight the importance of checking the regulator’s outlet pressure with a gauge. Maintaining consistent pressure, as outlined in these guides, ensures uniform water distribution throughout the system.
Ignoring pressure regulation compromises system efficiency and longevity.
Drip Tubing and Emitters
Drip irrigation installation guide PDFs dedicate significant attention to drip tubing and emitters, the core of water delivery. Tubing, often ½ inch poly tubing, forms the network distributing water. Guides detail punching holes for emitters or connecting ¼ inch barb fittings for micro-tubing.
Emitters, available in various flow rates (GPH), deliver water directly to plant roots. PDF resources explain selecting the appropriate GPH based on plant needs and soil type. Different emitter types – pressure-compensating, adjustable, and inline – are discussed.
Installation involves securely inserting emitters into tubing or connecting them via micro-tubing. Guides emphasize proper spacing based on plant size and root zone. Careful planning, as shown in diagrams within these PDFs, maximizes efficiency.
Choosing quality components ensures long-term performance.

Installation Process: Step-by-Step Guide
Drip irrigation installation guide PDFs outline a clear process: connect to the water source, install filtration, lay tubing, and finally, connect emitters for targeted watering.
Connecting to Water Source
Drip irrigation installation guide PDFs consistently emphasize a secure connection to your water source as the foundational step. Typically, this involves utilizing an outside hose faucet, offering simplicity for residential setups. However, the guides also detail options for connecting to pressurized water systems, requiring appropriate fittings and backflow preventers for safety.
Many PDF resources recommend installing an electronic timer for automated watering schedules, enhancing convenience and water conservation. The guides stress the importance of a tight seal to prevent leaks, often suggesting Teflon tape for threaded connections. Furthermore, they highlight the necessity of assessing water pressure before proceeding, as excessive pressure can damage the system components. Barb inlets, as detailed in some guides, facilitate direct connection to drip tubing.
Installing the Filter and Pressure Regulator
Drip irrigation installation guide PDFs universally stress the critical importance of installing a filter and pressure regulator immediately after connecting to the water source. The filter prevents clogging of emitters, a common issue detailed in troubleshooting sections of these guides. Mesh filters are frequently recommended, with varying micron ratings depending on water quality.
Pressure regulators are equally vital, reducing incoming water pressure to the optimal range for drip systems – typically around 25-30 PSI. PDF documents often illustrate proper orientation for these components, ensuring correct water flow. Guides emphasize selecting a regulator compatible with your system’s flow rate. Proper installation, as shown in diagrams, prevents damage and ensures efficient operation, extending the system’s lifespan.
Laying Out the Main Supply Line
Drip irrigation installation guide PDFs consistently advise careful planning when laying out the main supply line. This typically involves using ½-inch or ¾-inch polyethylene (poly) tubing, chosen based on garden size and water demand. Guides emphasize running the line along garden paths or burying it shallowly to protect it from damage and UV exposure.
PDF resources often include diagrams illustrating optimal layouts, minimizing bends and ensuring even water distribution. Proper securing of the line with stakes is also highlighted, preventing movement and kinks. Many guides recommend flushing the line before connecting drip tubing to remove any debris. Careful consideration of future expansion is also suggested within these installation documents.
Connecting Drip Tubing and Emitters
Drip irrigation installation guide PDFs detail various methods for connecting drip tubing and emitters. Utilizing punch tools to create precise holes in the main supply line is a common technique, allowing for the insertion of barbed connectors. Guides emphasize selecting emitters based on plant water needs and soil type, offering options like pressure-compensating and adjustable-flow emitters.
PDF resources often illustrate how to secure emitters directly into the tubing or use short lengths of ¼-inch tubing for precise placement. Proper sealing around connections is crucial to prevent leaks, and many guides recommend using clamps or zip ties. These installation documents also highlight the importance of spacing emitters appropriately for uniform watering.

Maintaining Your Drip Irrigation System
Drip irrigation installation guide PDFs stress regular flushing to remove debris, leak checks for efficiency, and winterization to prevent damage, ensuring system longevity.
Consistent upkeep, as detailed in these guides, maximizes water delivery and protects your investment in a sustainable watering solution.
Flushing the System
Drip irrigation installation guide PDFs consistently emphasize the critical importance of regularly flushing your system. Over time, mineral deposits and organic matter can accumulate within the drip tubing and emitters, leading to clogs and uneven water distribution. Flushing physically removes these obstructions, restoring optimal performance.
Typically, flushing involves removing the end caps of the drip lines and allowing water to flow freely through the system for several minutes. The duration depends on the system’s size and the level of buildup. Some guides recommend periodic flushing during the growing season, while others suggest a thorough flush at the beginning and end of each season.
Proper flushing, as detailed in these resources, extends the lifespan of your components and ensures efficient water delivery to your plants, maximizing their health and yield. Neglecting this maintenance step can significantly reduce system effectiveness.
Checking for Leaks
Drip irrigation installation guide PDFs universally stress the necessity of routine leak inspections. Even small leaks can lead to significant water waste and reduced system efficiency. Regular checks, ideally weekly during peak usage, are crucial for maintaining optimal performance.
Begin by visually inspecting all connections – at the water source, filter, pressure regulator, main supply line, and emitter connections. Look for any signs of moisture, puddling, or dripping. Pay close attention to areas where tubing bends or joins.
Many guides recommend gently squeezing the tubing to check for weakened areas. Promptly repair any leaks with appropriate fittings or patches, as detailed in the PDF. Addressing leaks quickly conserves water, prevents soil erosion, and ensures your plants receive the intended amount of hydration;
Winterizing Your System
Drip irrigation installation guide PDFs consistently emphasize thorough winterization to prevent damage from freezing temperatures. Water left in the lines can expand when frozen, causing cracks and breaks, leading to costly repairs. Complete drainage is paramount.
First, disconnect the system from the water source. Then, open all drain caps and flush the lines using air pressure – a compressor is often recommended – to remove all remaining water. Many guides suggest blowing out the lines until water no longer exits.
Remove emitters and filters, storing them indoors to protect them from the cold. Disconnect and drain the backflow preventer. Finally, store the tubing and components in a sheltered location. Following these steps, detailed in your PDF, ensures a trouble-free start next season.
Troubleshooting Common Issues
Drip irrigation installation guide PDFs detail solutions for clogs, low pressure, and leaks, offering practical fixes to maintain optimal system performance and water delivery.
Clogged Emitters
Drip irrigation installation guide PDFs consistently identify clogged emitters as a frequent issue, stemming from mineral deposits or particulate matter obstructing water flow. These guides emphasize preventative measures, like utilizing filters – a crucial component detailed within – to minimize clogging.
Troubleshooting steps typically involve flushing the drip lines to dislodge debris. Many PDF resources illustrate techniques for removing emitters for individual cleaning, often recommending a simple soak in vinegar to dissolve mineral buildup.
Furthermore, guides suggest periodic system flushes, especially before and after peak growing seasons, to proactively address potential blockages. Understanding water quality is also key; hard water necessitates more frequent maintenance, as outlined in comprehensive installation manuals.
Low Water Pressure
Drip irrigation installation guide PDFs frequently address low water pressure as a common performance issue, often linked to inadequate water source capacity or obstructions within the system. These guides stress the importance of accurately calculating flow rates and pressure requirements during the initial planning phase.
Troubleshooting sections detail checking for kinks or blockages in the main supply line and ensuring the filter isn’t excessively restricting flow. Many PDF resources recommend installing a pressure regulator, as described in installation steps, to maintain optimal performance.
Guides also suggest verifying the water source’s output – a garden hose may not deliver sufficient pressure for larger systems. Upgrading to a booster pump, detailed in advanced installation sections, is often presented as a solution.
Leaks in Tubing
Drip irrigation installation guide PDFs consistently highlight leaks in tubing as a frequent issue, often stemming from improper connections, damage during installation, or wear and tear over time. These guides emphasize the importance of secure fittings and careful handling of tubing during layout.
Troubleshooting sections detail inspecting all connections – barb fittings, couplings, and end caps – for tightness and proper seating. Many PDF resources recommend using appropriate tools, like punches for clean hole creation, to minimize damage during emitter installation.
Guides also suggest periodically checking tubing for cracks or punctures, especially in areas exposed to sunlight or physical stress. Repairing leaks promptly with appropriate connectors or replacement sections is crucial for system efficiency.