Singer sewing machines have been a cornerstone in the sewing industry since the 1800s, offering durability, versatility, and ease of use for both professionals and hobbyists alike.

1.1 The Importance of Singer Sewing Machine Manuals
Singer sewing machine manuals are essential for optimal use, providing detailed guidance on setup, operation, and troubleshooting. They ensure users understand machine features, maintenance, and repair, preventing errors and extending lifespan. Manuals are available as free PDF downloads, covering models from vintage to modern. They include step-by-step instructions, stitch guides, and safety tips, catering to both beginners and experienced sewists. Accessing a manual allows seamless operation, customization, and care, ensuring the machine performs at its best. Whether for basic sewing or advanced projects, Singer manuals are indispensable for maximizing efficiency and creativity. They empower users to unlock their machine’s full potential, making sewing a stress-free and enjoyable experience.
Getting Started with Your Singer Sewing Machine
Starting your Singer sewing machine journey is exciting! Begin with unboxing, initial setup, and understanding machine parts. These steps ensure a smooth sewing experience and set the foundation for creating beautiful projects effortlessly.
2.1 Unboxing and Initial Setup
Unboxing your Singer sewing machine is an exciting first step! Carefully remove the machine and accessories from the packaging, ensuring all components are included. Take a moment to inspect the machine for any damage. Next, place it on a stable, flat surface. Familiarize yourself with the accessories, such as bobbins, needles, and presser feet. Read the manual to understand the machine’s parts and features. Plug in the machine and test it to ensure it’s working properly. For specific models, refer to the manual for any additional setup requirements. Organize your workspace to keep accessories within reach. Proper setup ensures a smooth sewing experience, whether you’re a beginner or an experienced sewer.
2.2 Understanding the Machine Parts
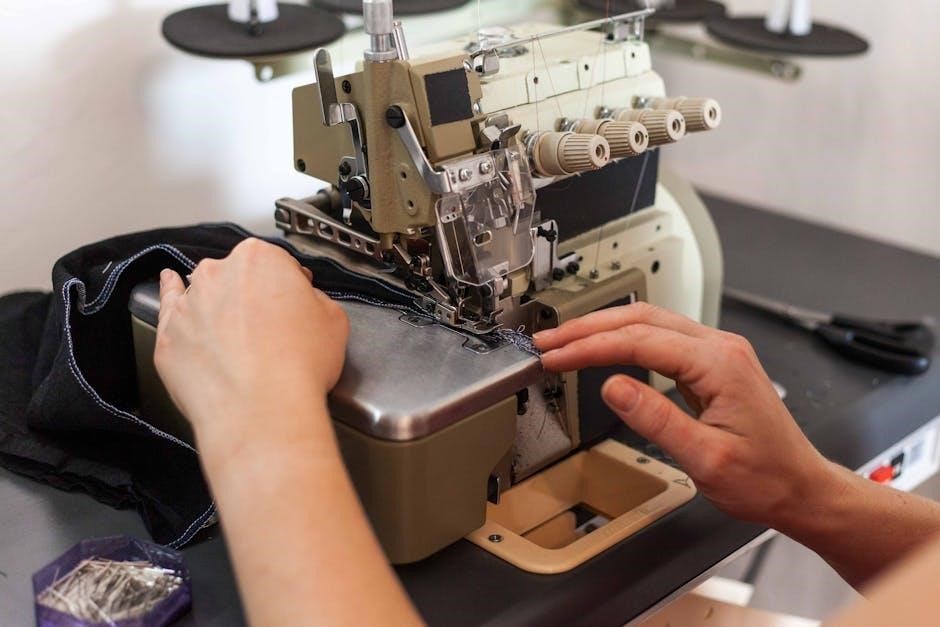
Understanding the parts of your Singer sewing machine is essential for effective operation. The machine consists of key components like the spool pin, bobbin winder, stitch selector, and tension dials. The spool pin holds the thread, while the bobbin winder is used to wind thread onto the bobbin. The stitch selector allows you to choose from various stitch patterns. Tension dials adjust the thread tightness, ensuring even stitching. The presser foot lifts and lowers to hold fabric in place, and the take-up lever regulates thread feed. Familiarize yourself with these parts by referring to your manual, which often includes a labeled diagram. Knowing each part’s function enhances your sewing experience and helps troubleshoot issues efficiently. Proper understanding ensures you use the machine to its full potential.
2.3 Step-by-Step Setup Guide
Setting up your Singer sewing machine is straightforward when following the manual’s guidance. Begin by unboxing and placing the machine on a stable surface. Plug in the power cord and ensure all accessories, like presser feet and bobbins, are nearby. Refer to the labeled diagram in your manual to identify key parts. Thread the machine by pulling thread from the spool, guiding it through the tension discs, and ending at the needle. Wind the bobbin and insert it into the bobbin case, ensuring proper alignment. Adjust the tension dials to achieve balanced stitching. Finally, test the machine on scrap fabric to ensure smooth operation. This step-by-step process ensures your Singer sewing machine is ready for use, providing optimal performance for your sewing projects.
2.4 First-Time User Experience
For first-time users, setting up and using a Singer sewing machine can be an exciting yet daunting experience. The initial unboxing reveals a robust, feature-rich device designed to cater to both beginners and experienced sewists. The comprehensive manual provided ensures a smooth transition from unpacking to operation, guiding users through each step. Many first-time users appreciate the clear instructions for threading, winding bobbins, and selecting stitches, which simplify the learning curve; The machine’s intuitive design often surprises new users with its ease of use, making even complex tasks manageable. Additionally, Singer’s customer support and online resources, such as forums and video tutorials, offer reassurance and assistance. This blend of user-friendly features and accessible support makes the Singer sewing machine an excellent choice for anyone new to sewing.

Basic Operations of the Singer Sewing Machine
Mastering basic operations like threading, bobbin winding, and stitch selection ensures smooth sewing; Follow the manual for step-by-step guides to achieve professional results effortlessly.
3.1 Threading the Machine
Threading your Singer sewing machine is essential for smooth operation. Begin by turning off and unplugging the machine for safety. Locate the spool pin and gently pull the thread through the tension discs to ensure proper tension. Next, guide the thread through the take-up lever, which helps regulate thread movement. Finally, thread the needle, ensuring it is seated correctly. Keep the presser foot up during this process to maintain the correct thread path. Avoid pulling the thread too tightly to prevent tangling or breakage. Refer to your specific Singer model’s manual for any unique instructions, and test your stitches on scrap fabric to confirm everything is correctly threaded. Proper threading ensures even stitches and professional-looking results.
3.2 Winding the Bobbin
Winding the bobbin correctly ensures smooth stitching and prevents thread jams. Start by turning off and unplugging your Singer sewing machine for safety; Thread the machine as described in your manual, then pull the thread to ensure it is seated properly. Place the bobbin on the winder and secure it. Wind the thread slowly, keeping it taut but not overly tight. Stop when the bobbin is about 80% full to avoid overfilling. Cut the thread and remove the bobbin. Insert the bobbin into its compartment, ensuring it rotates correctly. Pull a small amount of thread to test the tension. Properly wound bobbins ensure even stitching and prevent machine issues. Always refer to your Singer manual for model-specific instructions.
3.3 Selecting the Right Stitch
Selecting the right stitch is crucial for achieving professional results with your Singer sewing machine. Start by consulting your manual to explore the variety of stitches available, such as straight, zigzag, or decorative options. Each stitch serves a specific purpose, like straight stitches for basic sewing or zigzag for stretchy fabrics. Use the stitch selector dial or button to choose your desired stitch. Refer to the stitch guide in your manual for recommendations based on fabric type and project needs. Always test the stitch on scrap fabric to ensure proper tension and appearance. Proper stitch selection enhances the quality of your sewing and ensures a flawless finish. Experiment with different stitches to expand your creative possibilities and master various sewing techniques.
3.4 Sewing Your First Project
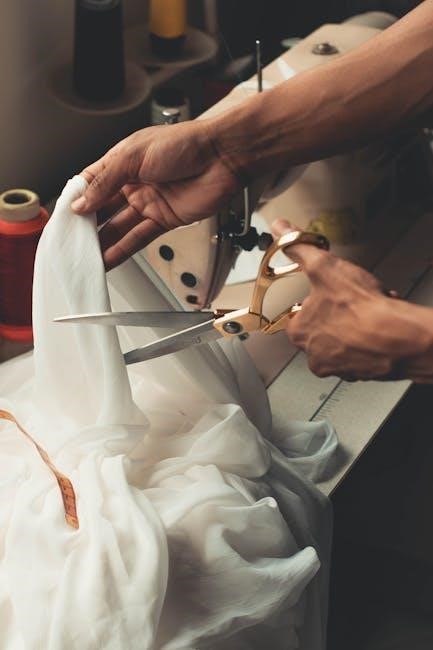
Start by choosing a simple project, such as sewing a straight line or a basic pouch. Refer to your Singer manual for guidance on selecting the right fabric and thread. Thread your machine as instructed, ensuring proper tension. Place your fabric under the needle, aligning it with the edge guide. Lower the presser foot and begin sewing slowly, keeping the fabric steady. Practice backstitching at the start and end to secure your work. Once complete, tie off the thread and inspect your seam. This initial project helps you familiarize yourself with the machine’s operation and builds confidence for more complex tasks. Always follow the manual’s tips for a smooth sewing experience.
Advanced Features and Techniques
Explore advanced stitching, customizable patterns, and specialized presser feet for quilting, embroidery, and heavy-duty sewing, enhancing your projects with precision and creativity.
4.1 Customizing Stitch Patterns
Singer sewing machines offer extensive options for customizing stitch patterns, allowing users to tailor their sewing projects with precision. With numerous built-in stitches, including straight, zigzag, and decorative options, you can easily adapt your machine to suit various fabrics and techniques. The manual provides detailed guidance on adjusting stitch length and width to achieve the desired effect. Additionally, many models allow for combining different patterns or creating custom stitches, enabling unique and personalized designs. For advanced users, some Singer machines even offer programmable stitches and memory functions. By exploring these features, sewists can unlock creative possibilities, ensuring their projects stand out with professional-quality results.
4.2 Using Different Presser Feet
Different presser feet are essential for achieving optimal results with your Singer sewing machine. Each foot is designed for specific tasks, such as zigzag, buttonhole, or zipper sewing. The standard zigzag foot is ideal for general sewing, while the walking foot is perfect for heavy fabrics like denim or leather. The manual provides step-by-step instructions on how to attach and use various presser feet, ensuring proper alignment and tension. By selecting the right foot for your project, you can improve stitch quality, reduce fabric slippage, and enhance overall performance. Experimenting with specialized feet can also unlock creative possibilities, allowing you to tackle a wide range of sewing projects with confidence. Always refer to the manual for compatibility and usage guidelines.

4.3 Quilting and Heavy-Duty Sewing
Singer sewing machines are well-suited for quilting and heavy-duty sewing, offering robust features to handle thick fabrics and multiple layers. The manual provides detailed guidance on adjusting stitch length and tension for optimal results. Use the walking foot or even feed foot to manage heavy materials like denim or canvas effortlessly.
For quilting, the machine’s large workspace and extendable table are advantageous. The manual also recommends using heavy-duty needles and threads to prevent breakage. By following these tips, you can achieve professional-grade stitching and tackle demanding projects with ease. Always refer to the manual for specific settings and techniques to ensure the best outcomes.
4.4 Embroidery and Decorative Stitches
Singer sewing machines offer a wide range of embroidery and decorative stitch options, perfect for adding intricate designs to your projects. The manual provides detailed instructions on how to select and customize these stitches, ensuring precise and beautiful results. With features like automatic needle threading and adjustable stitch length, embroidery becomes seamless and efficient. For advanced users, the machine allows for personalized stitch patterns, enabling unique and creative designs. The manual also includes tips for maintaining consistent tension and using the right presser feet for embroidery. By following the guide, you can unlock the full potential of your Singer machine for decorative stitching and embroidery projects. This feature makes Singer machines a favorite among crafters and professionals alike.
Maintenance and Care of Your Singer Sewing Machine
Regular maintenance is crucial for your Singer sewing machine’s optimal performance. Follow the manual’s guidance on cleaning, oiling, and checking for worn parts to ensure longevity.
5.1 Cleaning the Machine
Cleaning your Singer sewing machine is essential for maintaining its performance and longevity. Regularly remove dust, lint, and debris from the machine’s surfaces, bobbin area, and tension discs using a soft brush or cloth. Refer to your Singer sewing machine manual for specific cleaning instructions tailored to your model. Pay particular attention to areas around the needle, presser foot, and feed dogs, as these accumulate the most lint. For intricate parts, a small, dry paintbrush can be used to gently sweep away particles. Avoid using liquids or harsh chemicals, as they may damage the machine’s finish or internal components. By incorporating cleaning into your routine, you ensure smooth operation and prevent potential issues. Always unplug the machine before cleaning for safety.
5.2 Oiling and Lubrication
Regular oiling and lubrication are crucial for maintaining the smooth operation of your Singer sewing machine. Refer to your Singer sewing machine manual to locate the oiling points specific to your model. Turn off the machine and unplug it before applying a few drops of Singer-recommended sewing machine oil to the designated areas. Gently run the machine without fabric to allow the oil to distribute evenly. Avoid over-lubricating, as excess oil can attract lint and dust. For models with a built-in oil reservoir, ensure it is adequately filled. Regular lubrication prevents friction, extends the machine’s lifespan, and ensures optimal performance. Consult your manual for the recommended frequency of oiling based on usage.
5.3 Regular Maintenance Checks
Regular maintenance checks are essential to ensure your Singer sewing machine operates efficiently and lasts for years. Start by inspecting the bobbin area, tension discs, and presser foot for lint or debris buildup. Use a soft brush or lint roller to clean these areas thoroughly. Check the needle plate and feed dogs for alignment and ensure all screws are tightened properly. Examine the power cord and plugs for any signs of damage. Refer to your Singer sewing machine manual for specific maintenance schedules tailored to your model. For heavy users, perform these checks monthly to prevent mechanical issues. By following these routine inspections, you can identify and address potential problems early, ensuring smooth and uninterrupted sewing sessions. Regular maintenance not only extends the machine’s lifespan but also maintains its performance quality.

Troubleshooting Common Issues
Troubleshooting common Singer sewing machine issues involves checking thread tension, clearing jams, and resetting the machine. Consult your manual for error codes and repair guidance.
6.1 Common Problems and Solutions
Common issues with Singer sewing machines include thread bunching, bobbin jams, and uneven stitching. These problems often stem from incorrect threading or improper tension settings. To resolve, refer to your manual for step-by-step guidance on rethreading and adjusting tension. Regular cleaning and oiling can also prevent mechanical issues. For persistent problems, error codes in the manual provide specific solutions. If troubleshooting fails, contacting Singer’s customer support or visiting an authorized service center is recommended. Always ensure you’re using the correct presser foot and stitch type for your fabric, as outlined in the manual, to avoid unnecessary repairs and maintain optimal performance.
6.2 Understanding Error Codes
Singer sewing machines often display error codes to indicate specific issues, such as mechanical problems or incorrect settings. These codes are designed to help users quickly identify and resolve issues. Referencing the manual is crucial, as it provides a detailed list of error codes and their corresponding solutions. Common codes may relate to issues like improper threading, bobbin errors, or sensor malfunctions. By understanding these codes, users can address problems efficiently, reducing downtime and extending the machine’s lifespan. Always consult the troubleshooting section in the manual for accurate diagnoses and step-by-step fixes tailored to your Singer model.
6.3 Resetting the Machine
Resetting your Singer sewing machine can resolve various issues such as error codes, improper settings, or mechanical malfunctions. The process typically involves turning off the machine, unplugging it, and holding the reset button while plugging it back in. This restores default settings and clears temporary glitches. Always refer to the manual for specific reset procedures, as methods may vary by model. Resetting does not delete saved stitches or custom settings, ensuring your personalized preferences remain intact. Regular resets can help maintain machine performance and prevent operational hiccups. For optimal results, reset your machine after resolving issues or updating software to ensure smooth functioning.

Accessories and Supplies for Singer Sewing Machines
Essential accessories like presser feet, bobbins, and needles enhance sewing efficiency. Genuine Singer parts ensure compatibility and optimal performance. Model-specific supplies are available for various sewing needs and projects.
7.1 Essential Accessories for Optimal Use
Essential accessories for Singer sewing machines include various presser feet, bobbins, and needles, tailored for specific tasks like quilting, embroidery, or heavy-duty sewing. Zipper, buttonhole, and walking feet are popular choices for precision and control. Singer also offers accessory bundles and storage cases, ensuring organization and convenience. These tools enhance sewing efficiency and creativity, allowing users to explore diverse projects. Genuine Singer parts are designed for compatibility, ensuring optimal performance. Accessories can be found on Singer’s official website, sewing shops, or online marketplaces. Investing in the right supplies guarantees smooth operation and expands the machine’s capabilities, making sewing more enjoyable and professional.
7.2 Where to Find Genuine Parts
Genuine Singer sewing machine parts can be sourced directly from Singer’s official website, ensuring authenticity and compatibility. Authorized dealers and sewing machine retailers also carry a wide range of Singer parts. Online suppliers, such as those based in the UK, offer worldwide shipping for Singer sewing machine manuals and accessories. Additionally, Singer’s customer support provides guidance on locating specific parts for various models. For vintage or discontinued models, dedicated sewing communities and forums often share resources. Always verify the seller’s credibility to ensure the parts are genuine and suitable for your machine. This guarantees optimal performance and extends the lifespan of your Singer sewing machine.

Resources and Further Assistance
Singer offers comprehensive support through their official website, including manuals, customer service, and online communities. Additional resources like forums and sewing groups provide valuable tips and troubleshooting guidance.
8.1 Singer Customer Support and Warranty
Singer provides exceptional customer support to ensure seamless operation of their sewing machines. Users can access warranty information, repair services, and troubleshooting guides directly through Singer’s official website. The company offers dedicated customer service teams to address queries and concerns, ensuring timely resolutions. Additionally, Singer’s warranty programs cover parts and labor for a specified period, providing peace of mind for owners. Online resources, including manuals and FAQs, are readily available to help users maintain and repair their machines. This comprehensive support system underscores Singer’s commitment to customer satisfaction and product longevity.
8.2 Online Communities and Forums
Active online communities and forums dedicated to Singer sewing machines provide invaluable support and resources for users. These platforms allow sewists to share tips, troubleshoot issues, and exchange ideas. Websites like Singer’s official forums and independent groups on social media foster collaboration and knowledge sharing. Users can upload photos of their projects, ask for advice, and learn from experienced sewists. Additionally, these communities often host tutorials, contests, and events to enhance sewing skills. By engaging with these forums, users can gain insights into optimizing their Singer sewing machine’s performance and stay updated on the latest trends in sewing.
8.3 Model-Specific Tips and Tricks
Model-specific tips and tricks for Singer sewing machines can significantly enhance your sewing experience. By referring to the official Singer website or authorized dealers, you can access detailed guides tailored to your machine’s unique features. For example, the Singer 4423 model benefits from using heavy-duty needles for thick fabrics, while the Singer 221 Featherweight excels with lightweight materials. These resources often include optimized settings for various stitches, thread types, and fabric combinations. Additionally, Singer’s online database provides troubleshooting tips specific to each model, ensuring you can address common issues efficiently. By leveraging these model-specific insights, you can unlock your Singer sewing machine’s full potential and achieve professional-quality results in your projects.